payments & transfers – online banking
Send an international wire transfer
Wire transfers1 are a quick way to send money domestically or internationally. While you can do both in Mobile Banking2 and Online Banking, this guided demo will focus on wire transfers sent to international recipients in Online Banking.
For more information, visit our Wire Transfers page.
Need to send a wire transfer? Get started.
Screens simulated for illustrative purposes only. Actual experience may differ.
Step 1
Log in to Online Banking.
Before you get started, first gather the recipient's information:
- Recipient name and address
- Recipient's bank information such as SWIFT code
- Wire routing number
- Bank account number
- Account type
- If you're not enrolled in Secured Transfer, you'll also need your debit card number and PIN.

Step 2
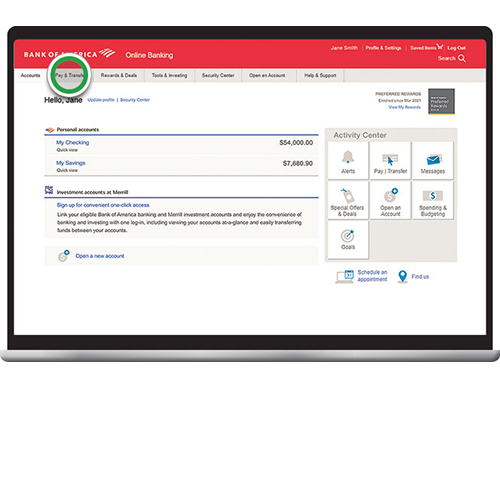
Select Pay & Transfer to get started.
Step 3
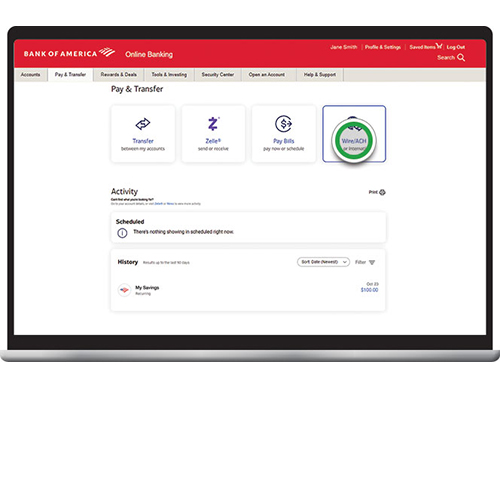
Select Wire/ACH.
Step 4
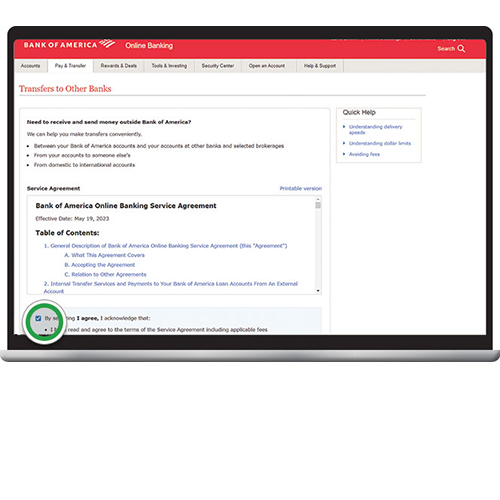
If this is your first time using this service, read and accept the Service Agreement to enroll.
Step 5
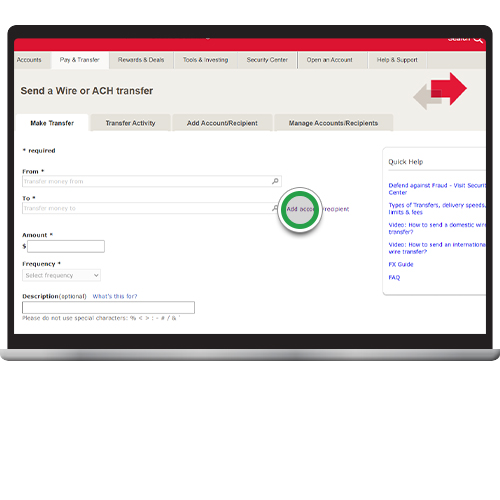
To send money to someone new, select Add Account/Recipient. If you are sending to an existing recipient, proceed to step 15.
Helpful tip! To learn more about sending a wire transfer and what you'll need, visit our Wire Transfers page.
Step 6
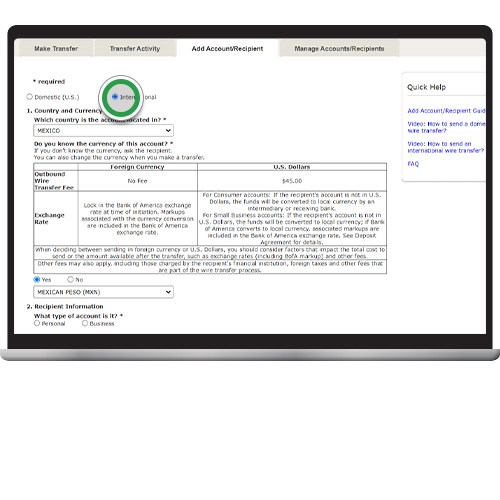
Select International, then choose the country of your recipient’s bank account and the currency you will send. If you don’t know the currency, the transfer will be sent in U.S. dollars. Reminder, this demonstration focuses on International Wire Transfers. For Domestic Wire Transfers, navigate here.
Note: The required information may differ by country and/or bank. For this demo, we'll choose Mexico.
Step 7
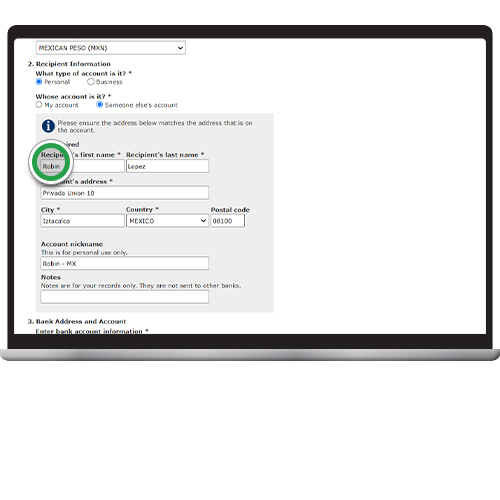
Add recipient’s information, including their address as on file with their bank. To choose country, select from the drop-down.
Step 8
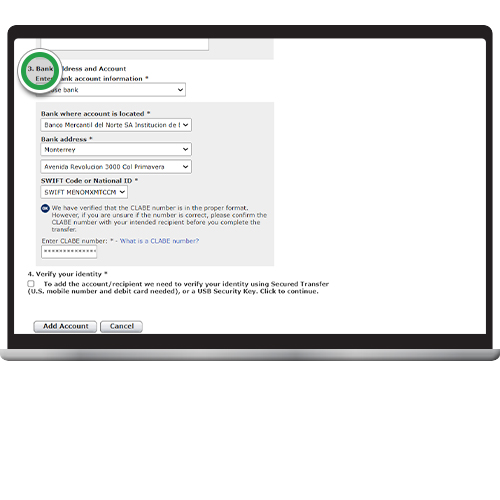
Now, enter recipient's bank address and account information. Select the bank name, address, and the SWIFT code or requested bank identifier. Then enter the account number or requested account identifier like IBAN or CLABE.
Helpful Tip! You can select different bank identifiers in this section based on your recipient bank country.
Step 9
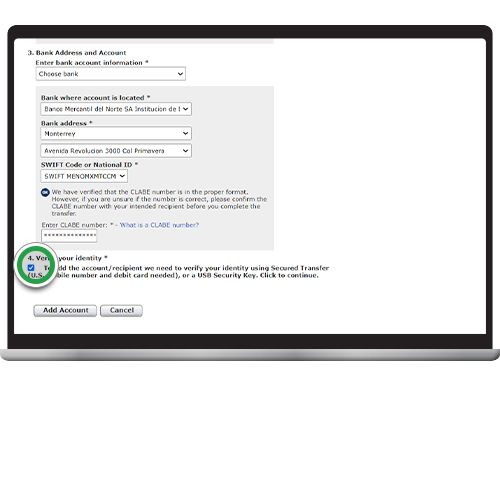
Check the box to Verify your identity before adding your recipient.
Step 10
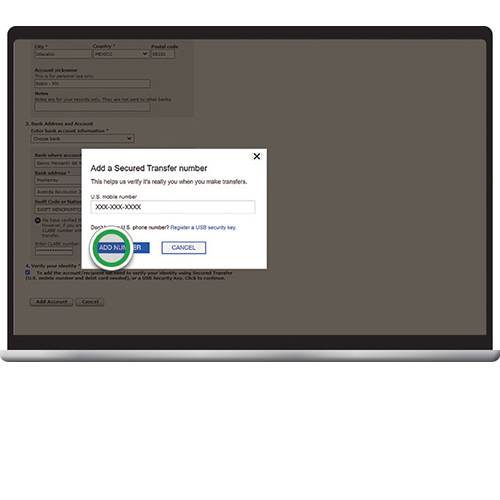
If you haven't already, you may be required to enroll in Secured Transfer to send your wire. To get started, add your U.S. mobile number and click Add Number.
Note: If you're already enrolled in Secured Transfer, you'll be prompted to request and enter an Authorization Code to add your recipient. Proceed to step 12.
Step 11
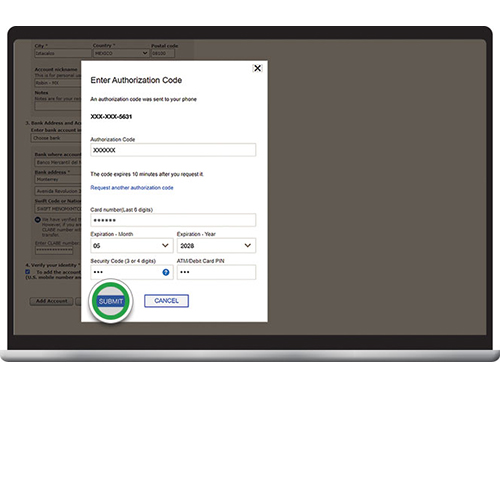
You'll receive a text message with an Authorization Code to complete enrollment. Enter your Authorization Code, then add your ATM/Debit card details. Click Submit to complete the enrollment.
Security Tip! Never share this code with anyone — we'll never call or text you asking for a code.
Step 12
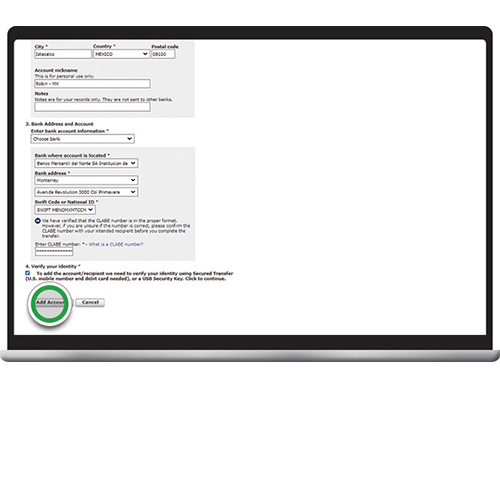
Select Add Account and wait for the information to be verified.
Step 13
Please wait. If you close this window prematurely, your recipient may not be added.

Step 14
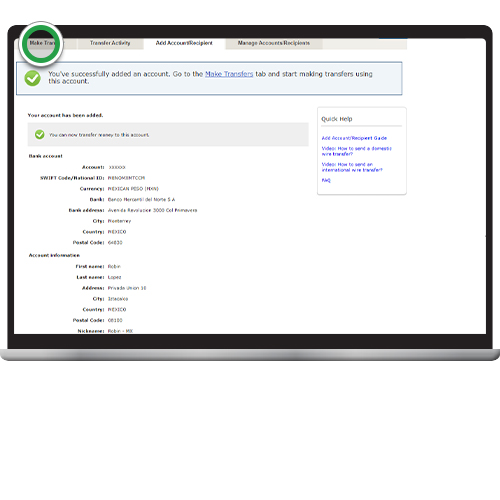
Once you see this screen, you've successfully added a new recipient. Select the Make Transfer tab to set up a new transfer.
Step 15
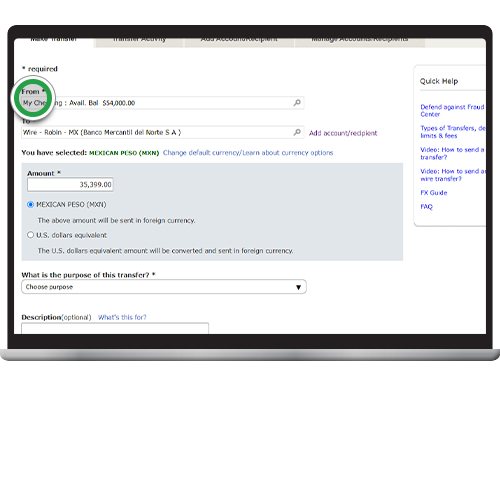
Select your "From" account for the transfer and then your "To" recipient. Enter the amount you want to send; the transfer will be sent in the currency you selected for the recipient. If needed, click Change default currency to update currency.
Note: There are no outbound wire transfer fees if sent in foreign currency. Markups are included in Bank of America exchange rates, which are determined by Bank of America in its sole discretion. You may be prompted to request an Authorization Code when your transfer exceeds a certain amount.
Step 16
Select the purpose of the transfer from the drop-down, enter a Description if needed and select Continue.

Step 17
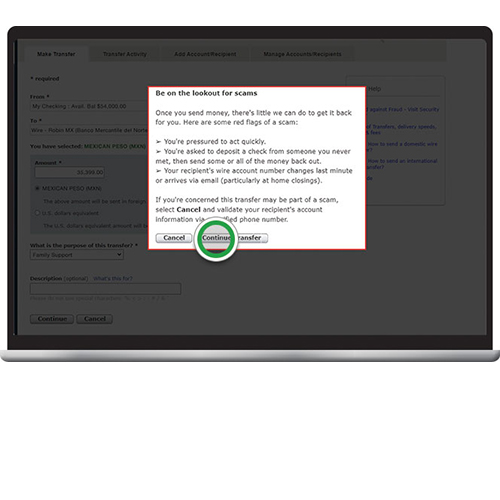
Review the important scam reminder, then click Continue Transfer.
Helpful tip! Always read warning messages. If you’re told to ignore them, it could be a scammer trying to steal your money.
Step 18
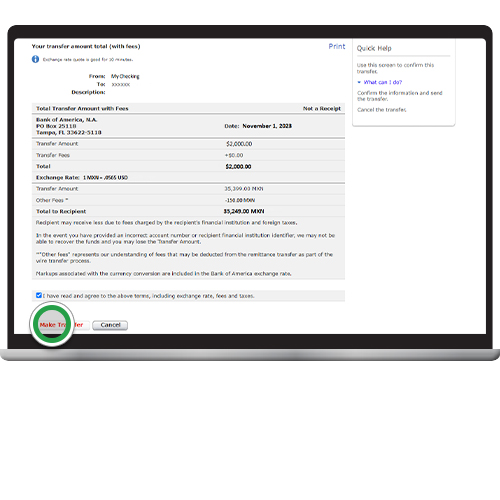
Confirm that all information is correct, then check the box after you've read and agreed to the terms, including exchange rate, fees and taxes. Select Make Transfer. If any info is inaccurate, and you need to make changes, select Cancel to start over.
Step 19
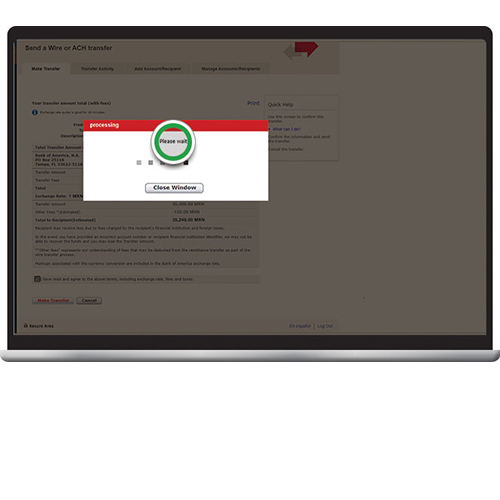
Please wait. If you close this window prematurely, your transfer may not be initiated.
Step 20
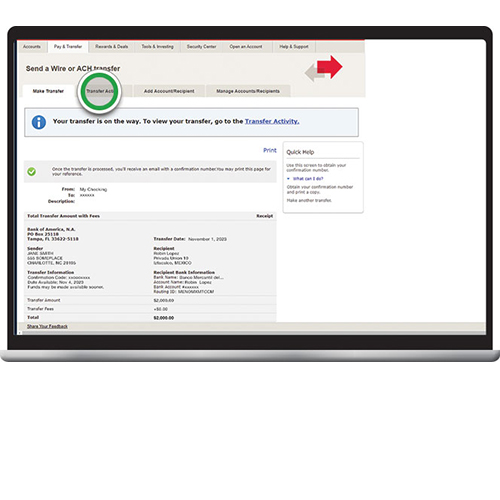
Once you see Your transfer is on the way at the top of this screen, your transaction has been submitted, and you'll receive an email confirmation. Funds typically are credited to the recipient within one to two business days.
Click Print to save this page.
Click the Transfer Activity tab to check the status and details of your transfer.
Step 21
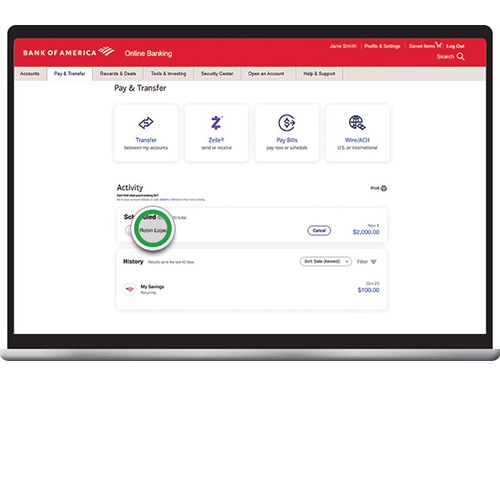
International wire transfers initiated from consumer accounts will show as Scheduled on the Activity screen and may be canceled within 30 minutes of submission. After 30 minutes, scheduled transfers will show as Processing and cannot be canceled.
Note: Wire transfers sent from small business accounts are immediately submitted for processing and cannot be canceled.
