payments & transfers – mobile banking
Using Zelle® to send money
Zelle® is a fast and easy way to send and receive money with friends and family, and there are no fees with our Mobile Banking app and Online Banking.1
Screens simulated for illustrative purposes only. Actual experience may differ.
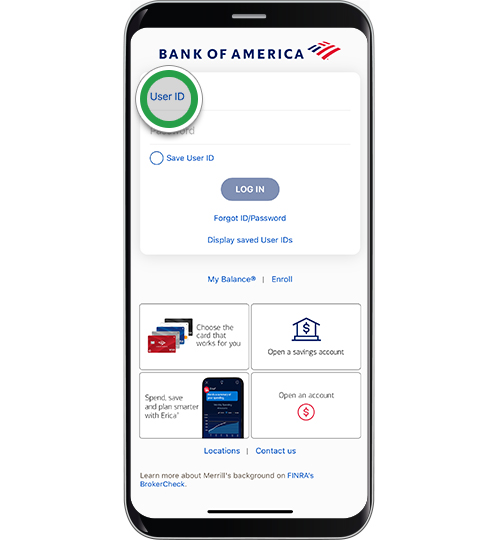
Step 2
Tap Pay & Transfer to get started.
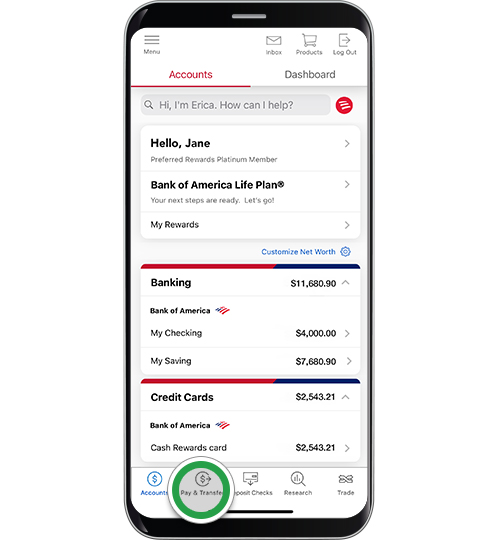
Step 3
Tap Zelle®.
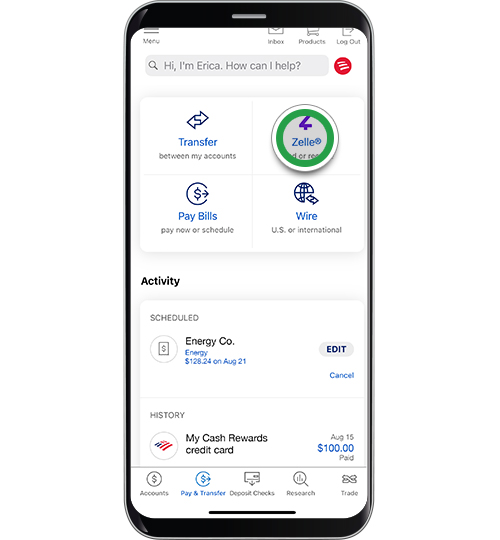
Step 4
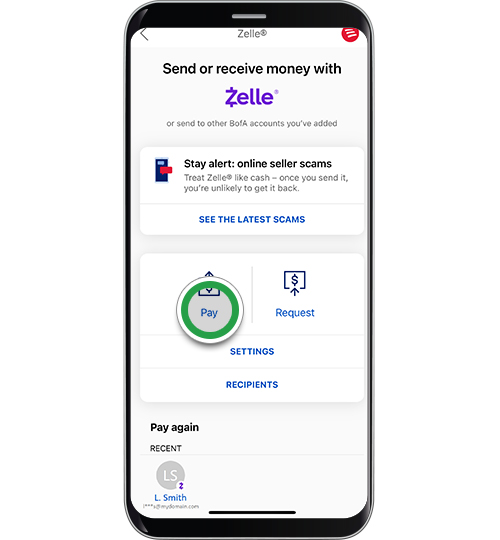
Tap Pay to send money. You can also request money to get paid back easily or divide expenses.
Note: If you're not already enrolled in Zelle®, you'll see a screen for setup. Tap Set up Zelle® and follow the prompts to get set up.
Step 5
If you are sending to a new contact, tap Add new person or company.
Note: For an existing contact, use the search bar to select a trusted recipient from your list. Look for the purple ‘Z’ to know who is already registered to use Zelle®. You can also use a unique QR code to pay people back. Tap the QR code icon next to the search bar to open your mobile device camera, scan their code, confirm and send. Proceed to step 11.

Step 6
Select who you’re adding. Tap Next.

Step 7
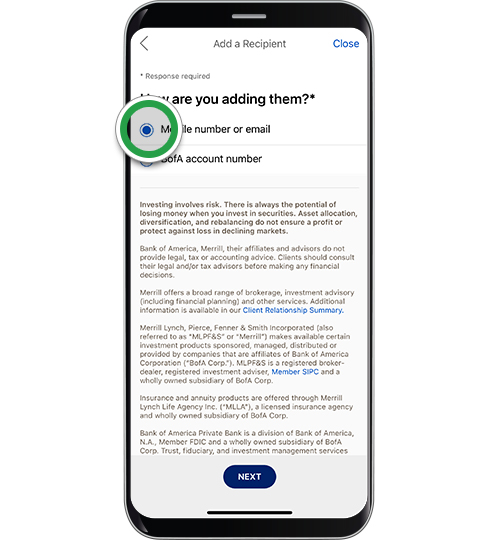
Select how you’ll add their information. Tap Next.
Step 8
Enter the details for your new contact. You can also tap Add from Contacts to select from the existing contacts in your phone.

Step 9
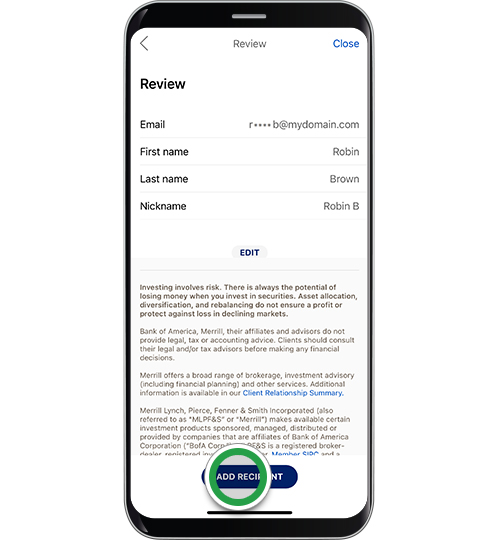
Review the details for your contact to ensure accuracy. Tap Edit to modify or Add Recipient.
Step 10
Read the information regarding Zelle payments and tap OK to authorize the new contact.

Step 11
Your recipient is added. To pay this or another contact, type the name in the search bar. Then tap on the contact you want to pay.

Step 12
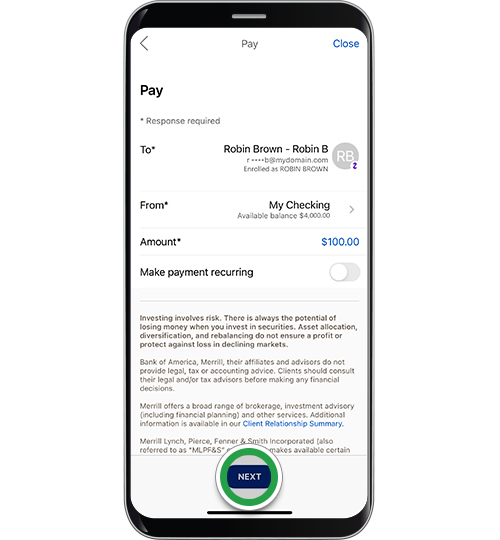
Choose the account you want to send money from and enter the amount. Tap Next.

Step 13
If you want to make the payment recurring, tap the toggle. For this demo, we’ll schedule a one-time payment. Tap Next.
Note: Scheduled and recurring payments can’t be made for unregistered Zelle® recipients (look for the purple ‘Z’ to know who is already registered to use Zelle®).
Step 14
Choose a payment date to schedule your one-time payment. Select today’s date if you want to make an immediate payment. Tap Next.
Note: If you selected recurring payments, you’ll see screens to select How often, How long, and Choose a start date.
Helpful tip! Transaction dates are based on Eastern time. Calendar dates may not match your current time zone.

Step 15
You can add an optional message for the recipient. Tap Next.

Step 16
Review the details for the payment to ensure accuracy. Tap Edit if needed. Tap Next to proceed.
Note: If you’re making an immediate payment, you’ll tap Pay.

Step 17
For payments to new contacts, you’ll see an authorization screen. Read the information and click OK to authorize the payment.
Note: You may need to request an authorization code to verify your identity before you can send your payment.

Step 18
Be sure to scroll down the screen to read important information about your scheduled payment. Tap the circle to agree to and acknowledge the terms. Tap Schedule.
Note: If you’re sending a one-time immediate payment, you’re not able to edit or cancel the payment. Instead, you’ll see a confirmation screen that your payment has been sent.

Step 19
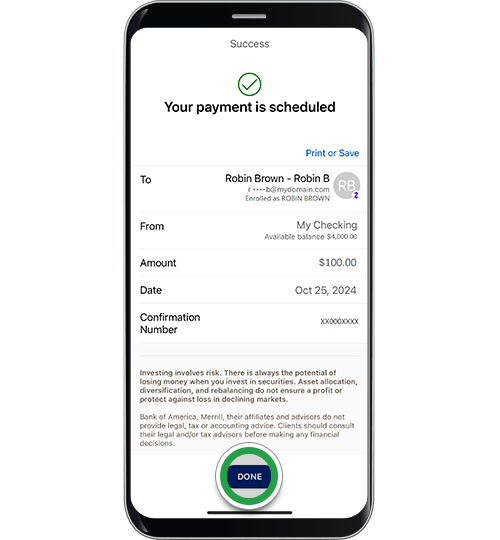
Your payment is scheduled. Tap Done to see the details on the Activity screen.
For scheduled and recurring payments, you can view, edit and cancel on the Activity screen.
Note: If the recipient is already enrolled, they’ll be notified once the payment is sent and typically receive their money within minutes. If they aren't yet enrolled with Zelle®, they’ll receive a text or email on how to get started.
